


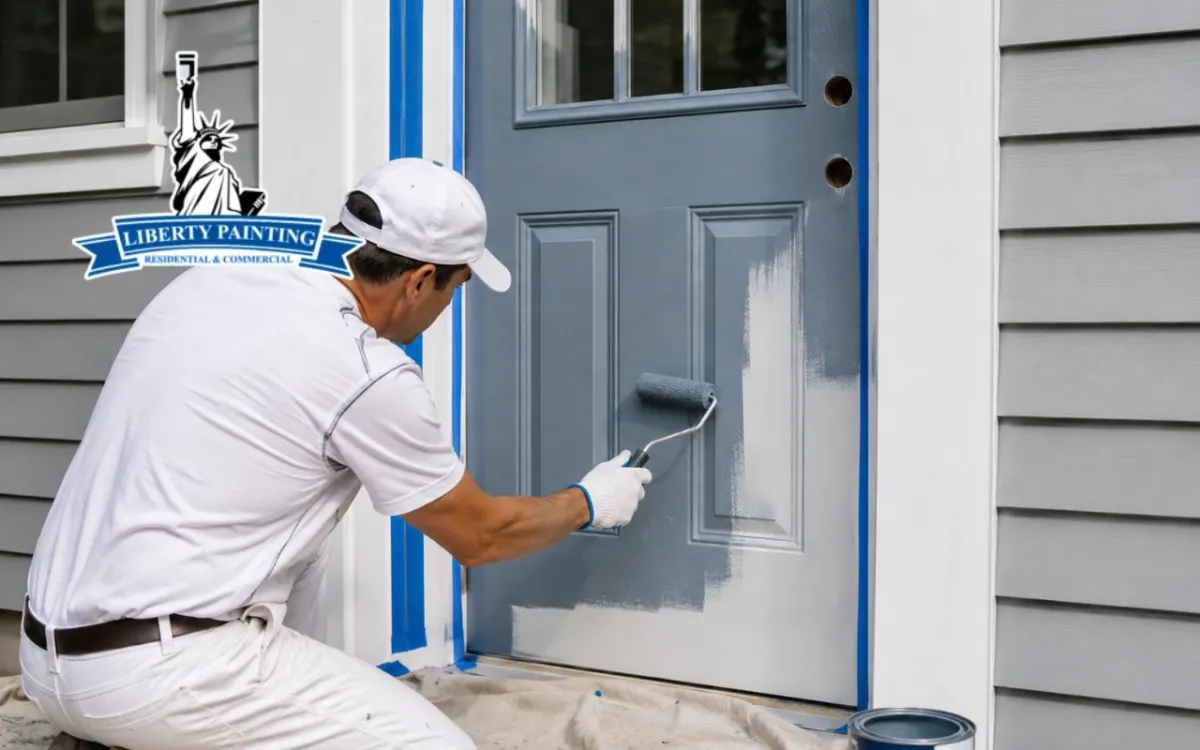
Why Does Painting an Exterior Door Revitalize Your Home?
Select Door Colors That Refresh Your Home’s First Impression
Prepare Every Surface Carefully for Stronger Paint Adhesion
Choose Exterior Paint That Protects Beauty Through Weather
Gather Simple Tools That Keep Door Painting Efficient
Follow These Steps to Create a Smooth Finish
Refine Application Techniques for Cleaner, More Even Results
Maintain Your Painted Door to Extend Its Freshness
Know When Professional Painters Can Simplify Your Project
What is the best way to prepare an exterior door?
How do I choose the right front door color?
Should I use satin or gloss on my door?
Painting an exterior door can quickly refresh your entrance, improve curb appeal, and protect the surface from daily wear. First, choose a color that fits your home. Next, prepare the door carefully and select suitable exterior paint. Finally, apply thin, even coats. At Liberty Painting, we follow these same basic principles to create clean, lasting exterior finishes.
Select Door Colors That Refresh Your Home’s First Impression
First, consider the style and colors already around your entrance. Your siding, brick, trim, shutters, and roof can guide the decision. Therefore, your new door color should feel connected to the rest of the home.
For example, navy and burgundy can suit traditional homes. Meanwhile, charcoal, black, and other simple shades often complement modern designs. Bright red can create energy, while green can make an entrance feel calm and natural.
However, always test colors before making your final choice. Sunlight and shade can change how a color looks during the day. At Liberty Painting, we encourage homeowners to compare samples under real outdoor light.
You can also explore front door color ideas for better curb appeal before choosing your shade. Additionally, consider neighborhood rules when an association controls exterior colors.
Prepare Every Surface Carefully for Stronger Paint Adhesion
Proper exterior door painting prep can make a major difference in the final finish. Even excellent paint may fail when dirt, loose coatings, or damaged areas remain underneath.
Therefore, start with a clean and dry surface. Then, inspect the door closely before sanding or applying primer.
Remove dirt with mild soap and clean water.
Let the door dry fully before continuing.
Sand rough or peeling areas until they feel smooth.
Repair small cracks or damaged wood with suitable filler.
Remove sanding dust before applying primer or paint.
Also, remove hardware when possible. Otherwise, carefully protect handles, locks, windows, and hinges with painter’s tape. At Liberty Painting, we treat preparation as part of the finish, not as an optional extra.
Good preparation creates a smoother base. As a result, paint can spread more evenly and maintain a cleaner appearance.
Choose Exterior Paint That Protects Beauty Through Weather
Next, pick paint made for outdoor exposure. The best paint for exterior doors should handle sunlight, moisture, temperature changes, and regular contact. Therefore, interior wall paint is generally not the right choice.
Sheen also affects the finished appearance. Satin creates a softer glow, while semi-gloss adds more shine and usually feels easier to clean. Gloss can create a stronger statement, although it may reveal surface flaws more clearly.
For additional guidance, review our simple guide to satin and gloss finishes. Then, compare the finish with your door condition and desired style.
At Liberty Painting, we also consider the door material before selecting coatings. Wood, metal, and previously painted surfaces may need different preparation or primers. Therefore, always check the paint manufacturer’s instructions before starting.
Gather Simple Tools That Keep Door Painting Efficient
Having everything ready makes painting an exterior door easier. Moreover, it prevents unnecessary stops while the coating is wet.
Use an angled brush for edges and detailed areas.
Work with a small roller for broad, smooth sections.
Keep painter’s tape nearby for protected edges.
Place a drop cloth under the working area.
Prepare sandpaper, cleaning supplies, and a clean cloth.
Choose primer when the surface or paint system requires it.
Additionally, gloves and eye protection can help during sanding and preparation. Always follow product safety directions and keep the work area well ventilated.
Follow These Steps to Create a Smooth Finish
A steady process improves the final result. Therefore, avoid rushing between preparation, primer, and finish coats.
First, remove or protect door hardware.
Next, clean the surface and allow it to dry.
Then, sand rough areas and repair visible damage.
Afterward, remove all dust from the surface.
Apply primer when needed for the door and coating.
Begin painting detailed panels and edges with a brush.
Then, use a roller across larger flat areas.
Allow the first coat to dry as directed.
Finally, apply another even coat when required.
While working, maintain a wet edge whenever possible. This approach helps reduce visible overlap marks. Additionally, avoid applying heavy coats because excess paint can create drips.
At Liberty Painting, we know drying time matters as much as application. Therefore, we never recommend rushing the next coat before the previous layer is ready.
Refine Application Techniques for Cleaner, More Even Results
Good technique can turn a basic project into a polished update. First, work from the upper sections toward the bottom. That way, you can correct small drips before they dry.
Also, use consistent pressure with your brush or roller. Heavy pressure can move too much paint, while light pressure may leave thin spots. Therefore, focus on smooth and controlled passes.
When painting detailed panels, follow the shape of the door. Meanwhile, roll broad sections with even strokes. Avoid repeatedly brushing areas that have started drying because the surface may become uneven.
If you want inspiration before beginning, browse examples from our completed painting projects. Seeing finished exterior work can help you define the look you want.
Maintain Your Painted Door to Extend Its Freshness
After the paint has fully cured, simple care can protect the new appearance. For example, gently clean the door when dust, fingerprints, or outdoor dirt becomes visible.
Use mild soap, water, and a soft cloth. However, avoid harsh cleaners or rough scrubbers that may damage the coating. Also, inspect the finish occasionally for chips, peeling, or moisture problems.
Small touch-ups can often prevent minor damage from spreading. Therefore, keep a small amount of matching paint when practical. You can also visit our painting tips and practical homeowner guides for additional maintenance ideas.
Know When Professional Painters Can Simplify Your Project
DIY painting can work well when the door is in good condition. However, some projects need more preparation, repair, or finishing experience.
For example, consider professional exterior painting services when the door has deep cracks, major peeling, difficult old coatings, or damaged surfaces. Professional help can also make sense when you want a highly even finish without spending your weekend troubleshooting the project.
At Liberty Painting, we handle exterior projects with careful preparation and clear planning. Moreover, our exterior work covers surfaces beyond the entrance when your home needs a larger refresh. Explore our professional exterior painting options to learn more.
Painting an exterior door may seem like a small improvement. However, the right preparation, paint, and technique can create a noticeable change. When you want professional guidance, request a free painting estimate from our team and tell us about your project.
Frequently Asked Questions
What is the best way to prepare an exterior door?
Start by cleaning the door and letting it dry completely. Then, sand rough areas and repair small defects. Remove all dust before priming or painting. For broader exterior preparation support, explore our exterior painting services and preparation approach.
How do I choose the right front door color?
Consider siding, brick, trim, roofing, and nearby landscaping first. Then, test several colors in daylight and shade. For more ideas, read our guide to choosing front door colors.
Should I use satin or gloss on my door?
The best sheen depends on the surface and look you prefer. Satin feels softer, while gloss creates more reflection. Therefore, compare both before deciding. Our comparison of satin and gloss paint finishes explains the differences clearly.
Can I see examples before starting my project?
Yes. Reviewing finished work can help you compare colors, finishes, and overall styles. Therefore, visit our painting project gallery for visual inspiration.
When should I contact a professional painter?
Professional help makes sense when preparation is difficult, damage is extensive, or you want a highly consistent finish. At Liberty Painting, we can review your needs and explain the next step. Simply reach our team.
References:
