


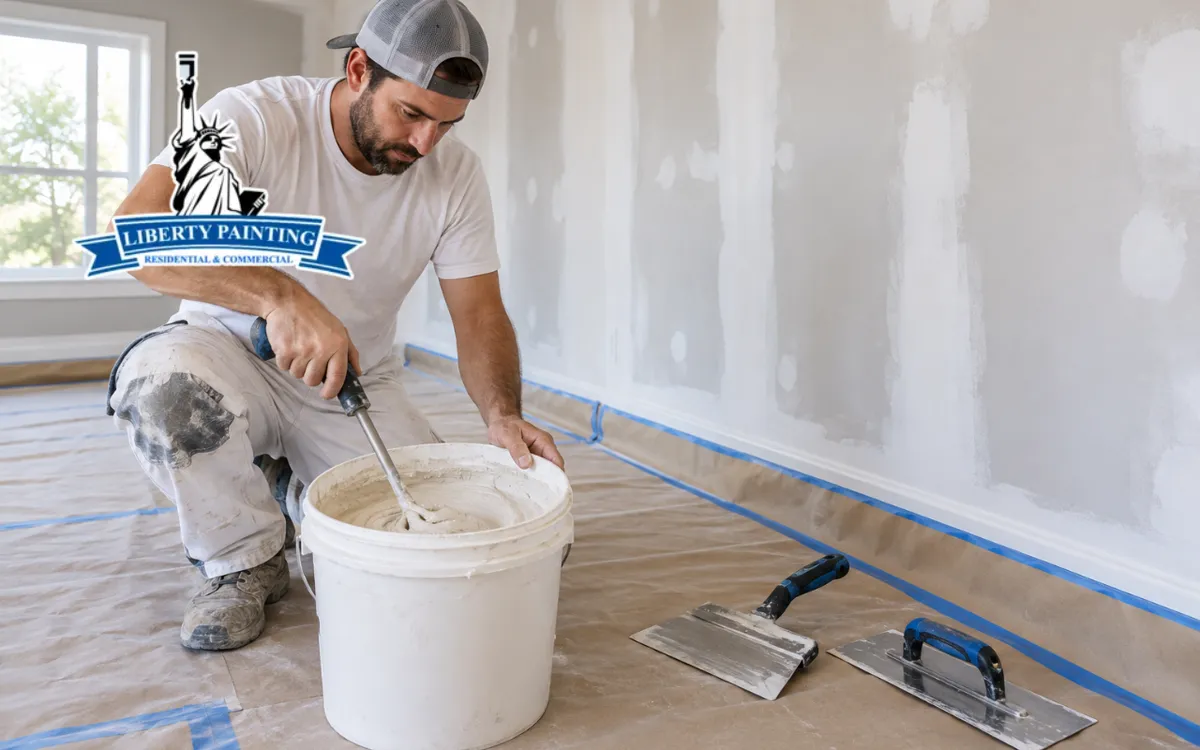
How Does Skim Coating Walls Create a Smooth Finish?
Understand Skim Coating Before Starting Your Wall Project
Gather Essential Tools Before Applying Any Joint Compound
Prepare Wall Surfaces Carefully for Smoother Final Results
Mix Joint Compound Properly for Easier Wall Application
Apply Thin Coats Systematically for Consistent Wall Coverage
How to Skim Coat a Wall Step by Step
Smooth Dried Compound Gently to Remove Surface Imperfections
Prime Finished Walls Correctly Before Adding Fresh Paint
Maintain Better Results Through Patience and Careful Inspection
What is skim coating and when is it useful?
Should damaged drywall be repaired before skim coating?
Can skim coating make old textured walls smoother?
Skim coating walls creates a smooth finish by covering shallow dents, patches, ridges, and uneven texture with joint compound. First, thin layers level the surface. Then, careful sanding removes small marks and raised areas. Finally, primer seals the repaired surface before painting. As a result, the wall looks cleaner, flatter, and more consistent after the final paint coats.
At Liberty Painting, we often see walls where old repairs or daily wear affect the final appearance. Therefore, good wall preparation should come before painting. A smooth base helps the finished color look cleaner under both natural and indoor light.
Understand Skim Coating Before Starting Your Wall Project
First, understanding what skim coating is makes the process easier to plan. Skim coating means spreading a very thin layer of joint compound across a wall. Therefore, the new layer can hide shallow imperfections and create a more uniform surface.
However, a skim coat is not the right solution for every type of wall damage. Large holes, loose drywall, moisture damage, or deep cracks may require repair first. Therefore, inspect the wall carefully before applying compound.
Common reasons to consider a skim coat include:
Old wall texture that creates an uneven appearance.
Small dents or shallow scratches across the drywall.
Several repaired areas that remain visible after patching.
Minor surface differences that could show through new paint.
Walls that need a cleaner base before repainting.
For more information about damaged surfaces, explore our common drywall issues guide before beginning.
Gather Essential Tools Before Applying Any Joint Compound
Next, gather your supplies before opening the joint compound. This preparation keeps the work moving and helps prevent uneven results.
You will generally need:
Premixed or powder joint compound.
A wide drywall or taping knife.
A smaller putty knife for tight areas.
A clean mixing bucket.
A drill and mixing paddle when required.
Fine and medium sanding materials.
Drop cloths and painter's tape.
Safety glasses and a suitable dust mask.
Also, choose clean tools with smooth edges. Dried material on a knife can leave lines across fresh compound. Therefore, inspect and clean each tool before starting.
At Liberty Painting, we know preparation can greatly affect the finished surface. For larger damage, our professional drywall repair information can help you understand available repair options.
Prepare Wall Surfaces Carefully for Smoother Final Results
Before applying compound, remove loose paint, damaged wallpaper, dust, and other weak material. Then, check the wall for holes or deeper cracks. These areas should be repaired before the full skim coat begins.
Next, lightly sand raised repairs until they sit closer to the surrounding wall. Afterward, remove dust with a clean cloth or suitable vacuum. Therefore, the compound can bond with a cleaner and more stable surface.
To prepare the work area:
Cover nearby floors and furniture.
Protect trim with painter's tape where needed.
Remove or protect switch and outlet covers.
Repair deeper holes before coating the entire wall.
Use good lighting to reveal raised or low areas.
Because proper preparation helps create smooth walls before painting, do not rush this stage. Instead, fix visible damage before covering the entire surface.
If holes need attention first, review our repairing holes in Drywall guide.
Mix Joint Compound Properly for Easier Wall Application
If you use powder compound, follow the manufacturer's mixing directions carefully. Generally, the mixture should spread easily without running down the wall. Meanwhile, premixed compound may only require gentle stirring before application.
Avoid creating unnecessary air bubbles while mixing. Otherwise, small pinholes may appear as the material dries. Also, keep the compound clean during the project. Dried pieces can create scratches and ridges during application.
At Liberty Painting, we prefer controlled preparation rather than rushing into application. Therefore, test a small amount on the wall first. If the compound spreads smoothly, you can continue with greater confidence.
Apply Thin Coats Systematically for Consistent Wall Coverage
First, place a manageable amount of compound on your wide knife. Then, spread it across the wall using steady pressure. Keep each coat thin because heavy layers require more sanding and may dry unevenly.
Next, slightly overlap each pass. This approach helps reduce gaps between sections. Also, remove obvious ridges while the material remains workable.
How to Skim Coat a Wall Step by Step
Start near one side of the wall and work in small sections.
Spread a thin coat using smooth and controlled strokes.
Overlap nearby passes to reduce visible lines.
Remove excess compound before it begins setting.
Allow the entire surface to dry according to product directions.
Inspect the wall under bright light before sanding.
Apply another thin coat when low areas remain visible.
Because skim coating walls requires control, thin applications are usually easier to manage. Meanwhile, more serious damage may need drywall repair services before this finishing work begins.
Additionally, avoid trying to cover every flaw with one heavy application. Instead, build the surface gradually with controlled layers. This approach makes sanding easier and reduces noticeable ridges.
Smooth Dried Compound Gently to Remove Surface Imperfections
Once the compound has dried fully, inspect the wall before sanding. First, identify ridges, raised edges, and other visible marks. Then, sand lightly instead of pressing hard against the surface.
Start with an appropriate medium or fine sanding material based on the wall condition. Afterward, use finer sanding for the final smoothing. However, avoid removing more compound than necessary.
Also, keep the room well lit during inspection. Side lighting can make small ridges easier to see. Finally, remove sanding dust before adding another coat or primer.
At Liberty Painting, homeowners can also choose professional help when wall preparation becomes too extensive for a simple project. Therefore, consider the condition and size of the area before continuing alone.
Prime Finished Walls Correctly Before Adding Fresh Paint
After final sanding, clean the entire surface carefully. Then, apply a suitable primer before painting the skimmed wall. Fresh joint compound is porous, so primer helps create a more even painting surface.
In addition, primer can reduce visible differences between repaired areas and surrounding drywall. Therefore, it supports more consistent coverage once the final color is applied.
After the primer dries, inspect the wall again under strong light. If a small flaw remains, correct it before applying finish paint. Then, continue with your chosen color.
For the next stage, review our interior painting services and see how careful preparation supports a finished room.
Maintain Better Results Through Patience and Careful Inspection
A successful finish depends more on patience than speed. Therefore, allow each coat to dry before sanding or covering it. Also, keep your knife clean throughout the project.
If several imperfections remain after sanding, add another thin layer instead of one heavy coat. As a result, you can gradually improve the surface without creating unnecessary buildup.
At Liberty Painting, we believe the wall should be properly prepared before the final color goes on. Therefore, our team focuses on the surface beneath the paint as well as the visible finish.
Additionally, inspect the wall from different angles before painting. Changing the light direction can reveal small areas that need more attention. Consequently, correcting those areas now can improve the finished appearance.
If your project involves widespread cracks, holes, or damaged drywall, professional evaluation may be the simpler path. You can request a wall assessment and discuss the condition of your walls with our team.
Frequently Asked Questions
What is skim coating and when is it useful?
Skim coating adds a thin compound layer over a wall to create a more even surface. Therefore, it can help with shallow flaws, patches, or unwanted texture. For related wall conditions, read our guide to common wall problems.
Should damaged drywall be repaired before skim coating?
Yes, deeper holes and unstable areas should usually be repaired first. Otherwise, the skim coat may only cover the visible problem. For useful repair steps, visit our drywall hole repair guide.
Can skim coating make old textured walls smoother?
Yes, it can help create a flatter surface over certain wall textures. However, the wall should first be stable, clean, and properly prepared. For larger projects, explore our wall and drywall repair services.
Do skim-coated walls need primer before painting?
Yes, primer is important because fresh compound absorbs paint differently from existing wall surfaces. Therefore, priming supports more consistent coverage. After preparation, explore our professional interior painting options.
When should I call a professional for wall preparation?
Consider professional help when walls have widespread damage, deep cracks, large holes, or difficult uneven areas. Also, larger rooms can require extensive preparation. To discuss your project with our team, contact us.
Skim coating walls can turn worn or patched surfaces into a cleaner base for fresh paint. However, the best finish depends on preparation, thin applications, sanding, and proper primer. At Liberty Painting, we can help when wall damage or project size makes professional preparation a practical choice. With careful work, your walls can become a smooth canvas for your next interior update.
References:
